How to make a tote bag (from an old T-shirt) ~ DIY

Tote bags. Tote bags, everywhere. If you wanna look fab but at the same time don’t want to spent much on a tote bag, then this is the place for you.

All you will need is :

  • an old T shirt (the bigger you want your bag, the bigger a shirt you will need). Also, make sure that the T-shirt is strong enough to take the weight of whatever you want to carry in your tote.
  • a pair of scissors
  • needle
  • thread (matching or contrasting colour)
  • some straight pins
  • a marker


Katnip!1795


STEP 1 :  Choose your T-shirt (obviously)

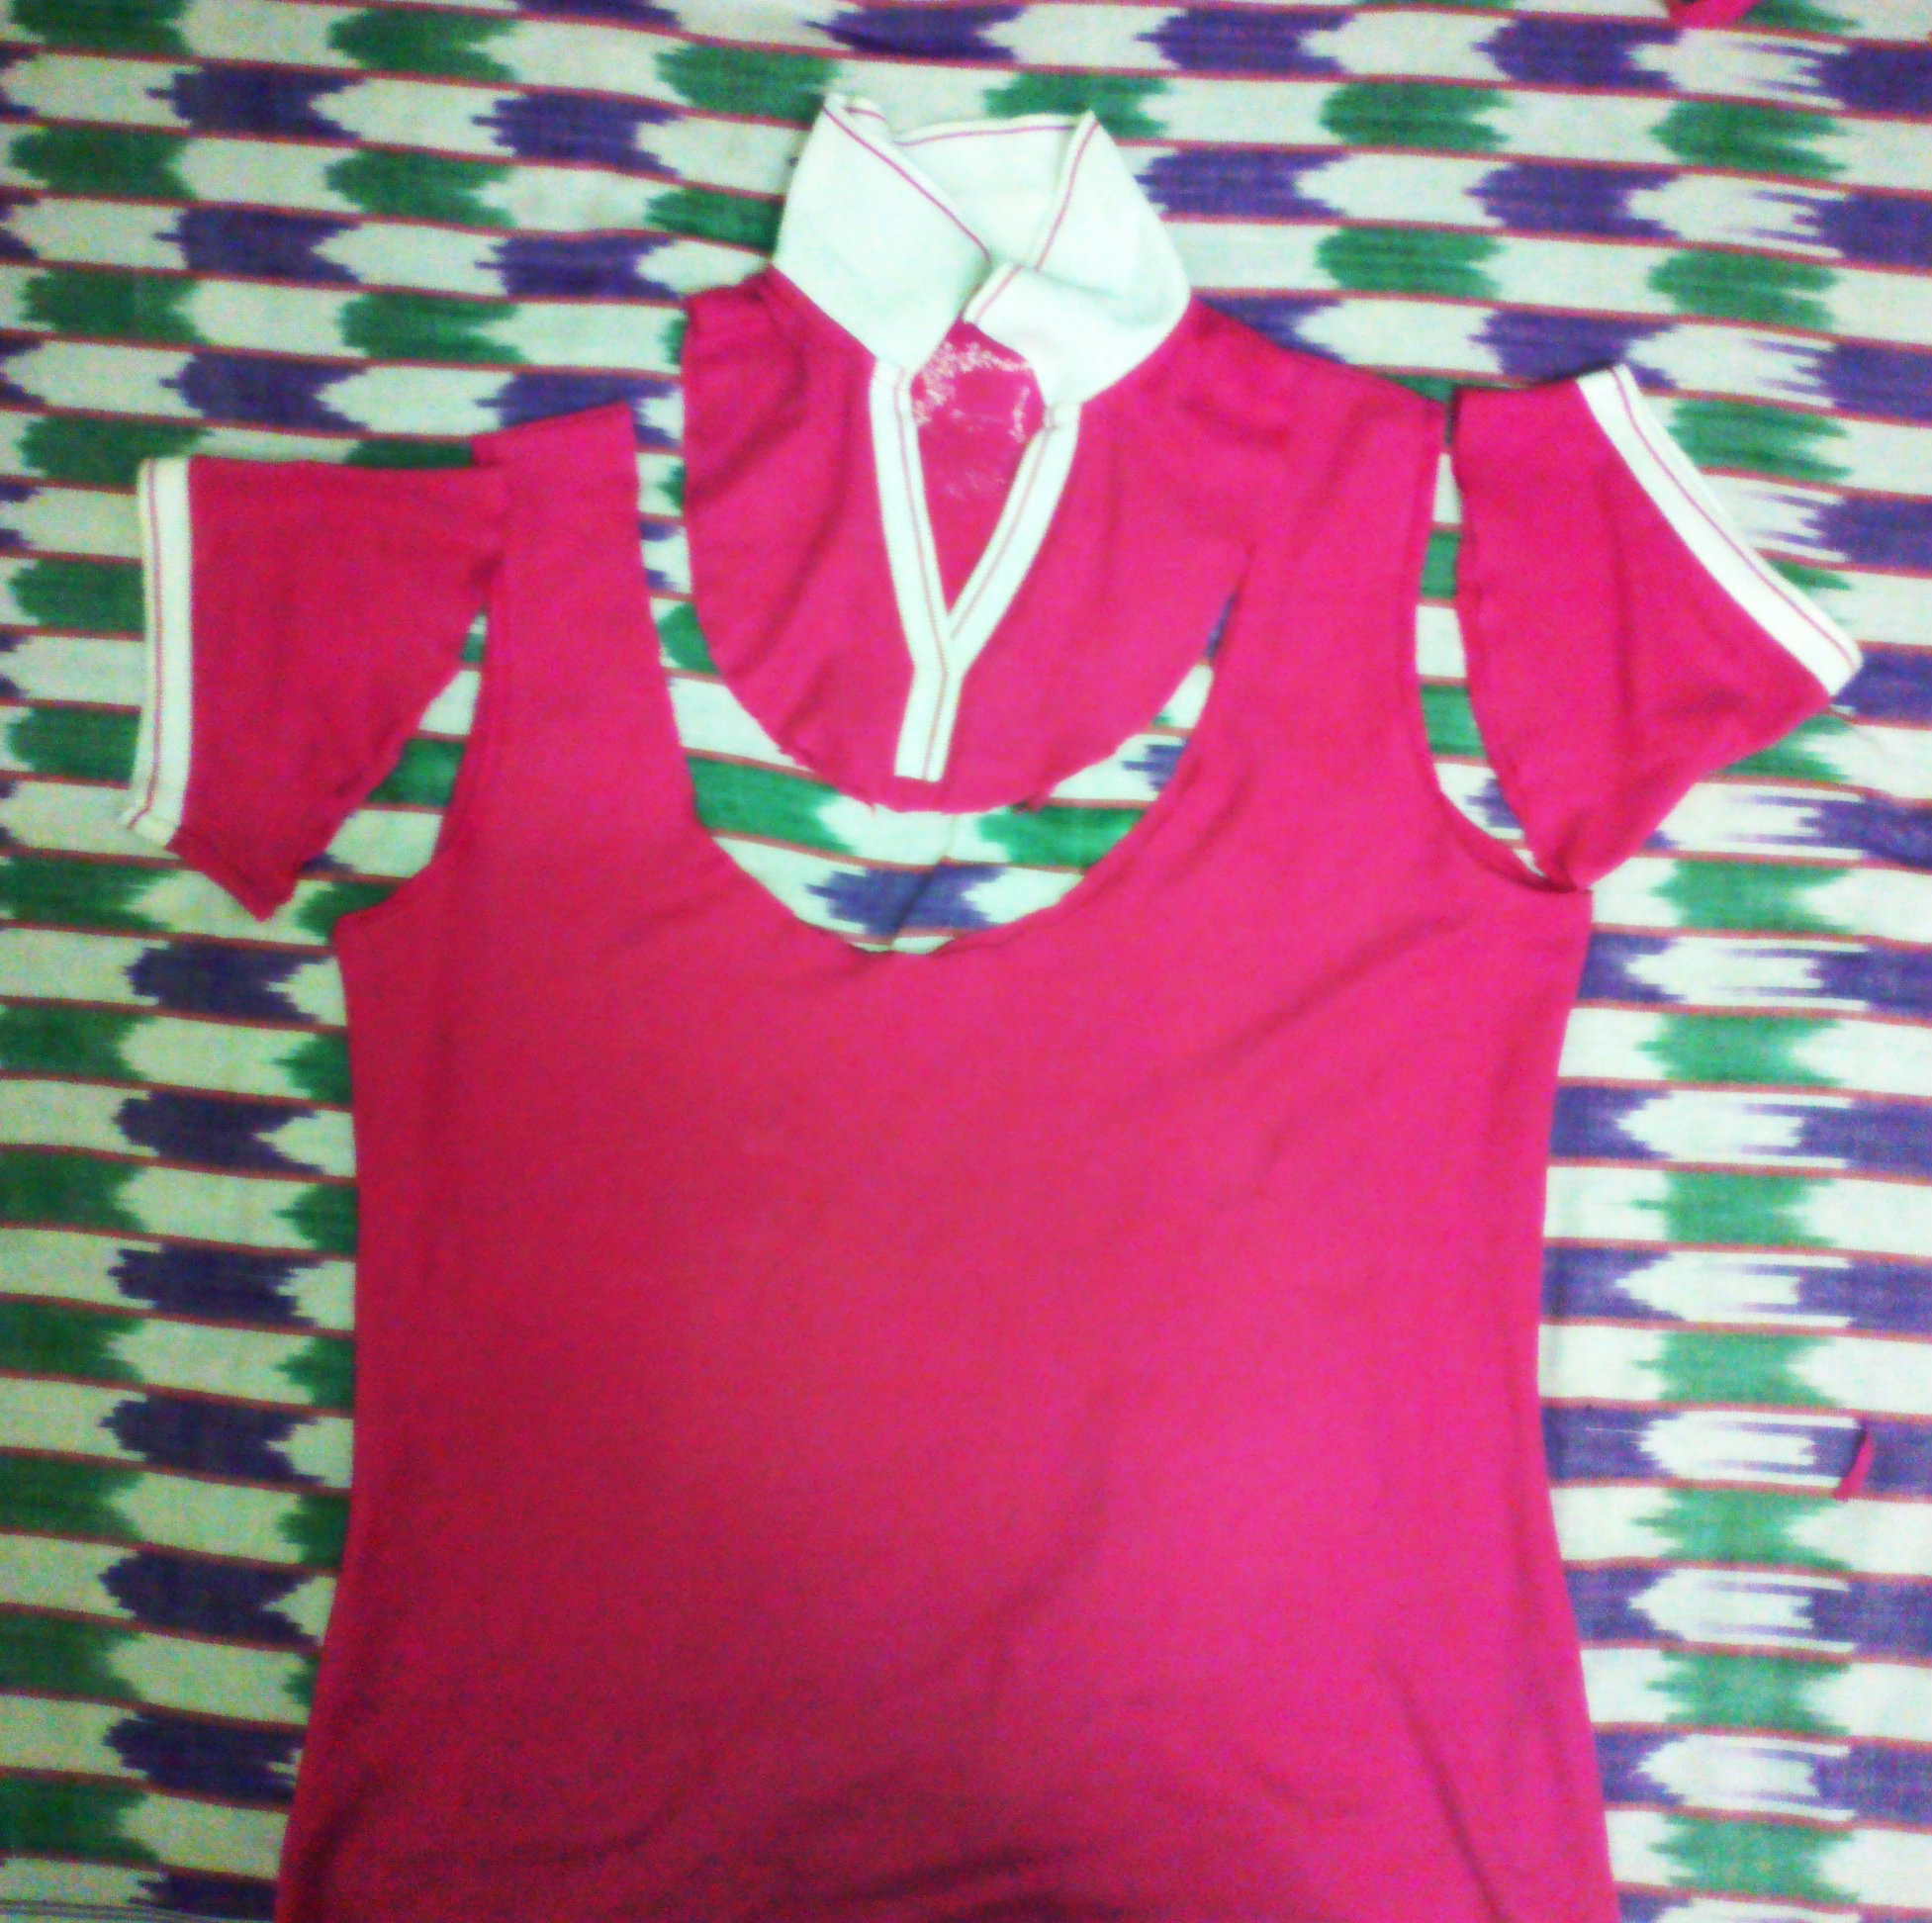
I choose an old T-shirt which i harldy ever used. Any kind will do, even sleeveless.


STEP 2 : Cut out the sleeves and neckline

Forgive my photography, but I made this late last night and was really sleepy. Basically, when this is what you have to do. For the sleeves, cut along the hemline so you don’t have to stitch it again.

image339      Katnip!1791

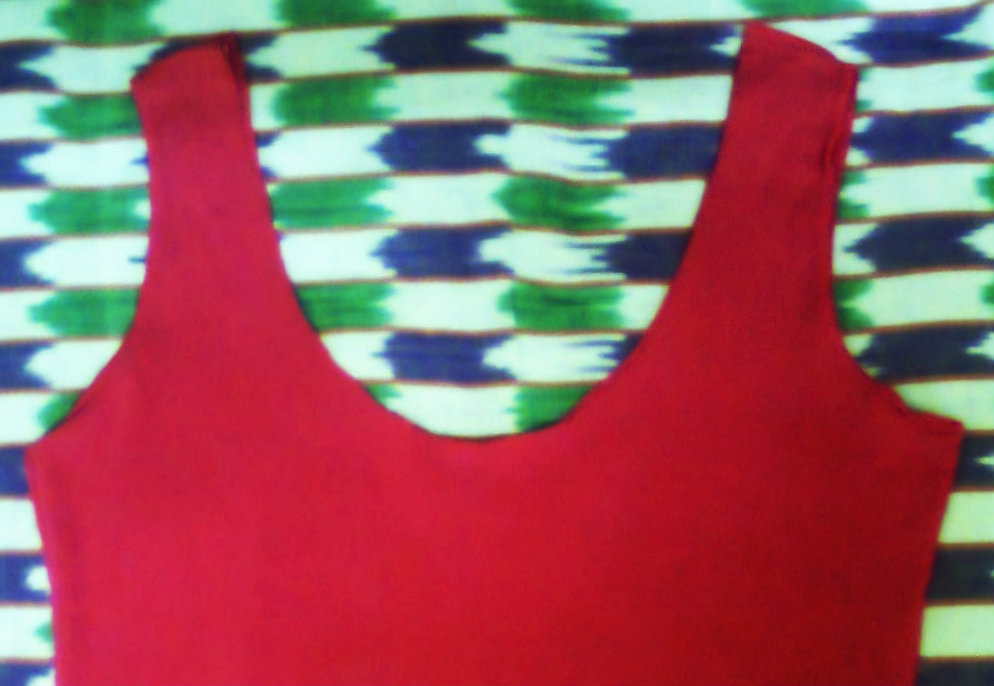
This is basically what your ‘top’ should look like once the sleeves and the neck is out. TO get an even cut for the neck, you can trace out a semi circle with the help of a dish (or something round).

STEP 3 : Pin the bottom shut

With the help of a marker, draw a straight line from the bottom where you want to stitch bag shut. Take some straight pins and close the bottom of the shirt. It should look something like this :

image344


If you want a bigger bag, pin it near the hem line of the shirt.

image342


Step 4 : Thread the needle (the hardest part)

Thread the needle. If you can do this, you can do anything.

image346 image347 image349


Step 5 : Sew the bag shut

Start stitching along the line you drew. The pins will help the cloth stay in place for the perfect stitch. Make sure your stitches are not HUGE. Try to make them as close together as you can. This will ensure a longer life for your bag.

Katnip!1788

Step 6 : Turn your bag inside out (or outside in, whichever you prefer)

Your bag is ready. Get ready to flaunt it and get those awe-ed expressions from your girlfriends when you tell them “I made it”! 😀

Katnip!1794

Your Tote Bag is ready! 🙂


How To Paint A Mural :: A Guide To Complete Awesomeness!!

The walls in my room were green. Green. Yes, green. One of my most hated colours, and it make my room look, well, YUCK! So, I decided to spice it up a bit. But the big question was, how?

The first thing which came to my mind at this question was to make a mural. This choked up another question, a mural of exactly what?
I googled about the idea, and finally came to the conclusion that I wanted a tree. Now I know that trees as murals are meant only for little kids, but I just had to have one for some reason!
Now came the big question of how to make this tree.
The answer was pretty simple, and just needed some basic knowledge and a little information, and all you will require is paint, paint brushes, a pencil, eraser, a bucket, a washcloth, some news paper, a ladder (or anything you can climb), and some good drawing skills!
STEP 1 – CLEAN YOUR WALLS.

This is the most basic and important step before painting, which many people skip. Take some warm water in a bucket and wash the area you intend to paint.

In my case, I had to clean the walls of the entire room since i repainted and then made the mural.

Washing your walls with (obviously) clean them, and take out any dust particles.
STEP 2 – PREPPING THE AREA.
This step requires you to spread newspapers on your floor, so that the paint which drips will eventually fall on the newspapers.
STEP 3 – DRAWING YOUR TREE.
Pretty straightforward! Draw your tree, with approximations as to where you want to place the various elements like the leaves, flowers, birds (or you could choose to go with only the silhouette of the tree).
If you are not confident of yourself, then you could ask your friend for help.
This one site said you could put up a silhouette of the tree you want in front of a projector to help you
draw, but I didn’t really find it helpful.
STEP 4 – FINALIZING YOUR DESIGN.
This is a really important step. Because once you paint your tree, there are no room for any corrections in the design. Make sure you are absolutely satisfied with the drawing that you have, and only then proceed with the colors.
STEP 5 – CHOOSING YOUR COLORS AND PAINT BRUSHES.

Choose an appropriate color for your tree because, as I have already mentioned, once painted, there wont be any room for correction. Make sure you choose a color which is in contrast with your walls.

As for paint brushes, you will need then in various sizes. Thick ones for large areas, and thin ones for detailing.

STEP 6 – START PAINTING.
This might seem scary at first, but it is not. Trust me. Just start painting like you would do on a piece of paper.

Start from the bottom and then work your way up your wall. This reduces the chances of mistakes, and allows room for improvement in the design.

STEP 7 – DETAILING.

Once you are done with the structure of the tree, start with the detailing. You can add leaves, flowers, maybe a few birds, whatever you like!
STEP 8 – SHOW OFF YOUR TREE!
Show off! Make everyone know that this beauty is your artwork! Take a picture with! Upload it to social networking sites! Make it your profile picture!

STEP 9 – BASK IN THE GLORY.
Bask in glory as people praise you and make you ‘feel off’!